Creating a Flying Machine
I have always had a passion for flight. As a young kid I spent a lot of my time making gliders out of toothpicks, and tissue paper. As I grew older my ambitions grew larger. I began jumping off of my house with grocery bags, then trash bags, I was always convinced they held me up at least a fraction of a second. Later, I attempted to design a glider out of bamboo poles and a tarp, but to my surprise the design did not prove to be successful. I fantasized about one day creating a successful flying contraption.
Much later I became slightly more logical. In the ninth grade I juggled school and ground school in an attempt to get my pilot's license. I passed ground school and started taking flying lessons. Unfortunately, this did not last long due to my lack of time and the incredibly high price of fuel and airplane rental time. In addition to this, I didn't particularly want to pursue a career in aviation. I was more interested in the engineering aspect of flight than the task of moving airplanes from point A to point B.
Throughout my life I have spent a significant amount of time outdoors. I enjoy hiking, camping, rock climbing, among other things. Almost anyone who has reached the summit of a mountain can relate to the longing to fly back to the base rather than taking the long walk back to the bottom. This is the idea I have been obsessing over for quite some time. The idea merging of my passion for flight and my passion for the outdoors thrilled me. During the second semester of my senior year I pitched a radical independent project to my teachers. I proposed that I would create a paraglider wing from scratch and keep a blog documenting my work in lieu of some other class work. This page documents the next four months of my life directly following that moment.
Work begins: January 20th, 2016
Specifications:

|
| ||||
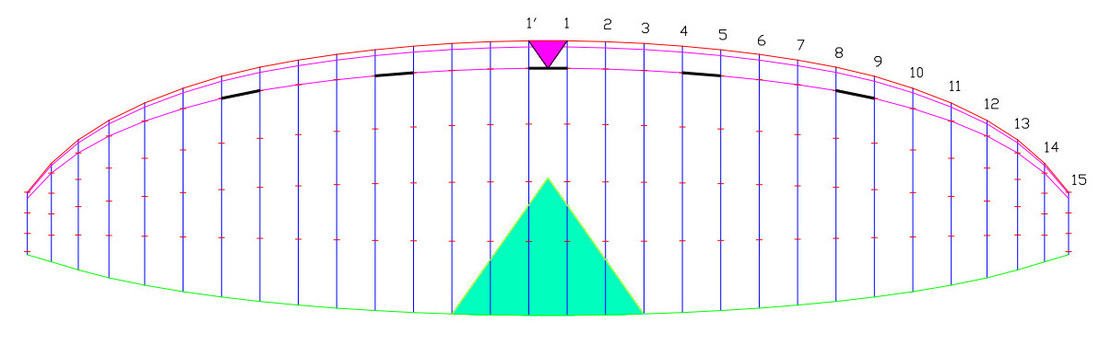
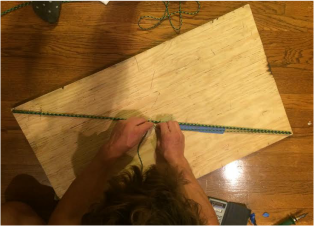
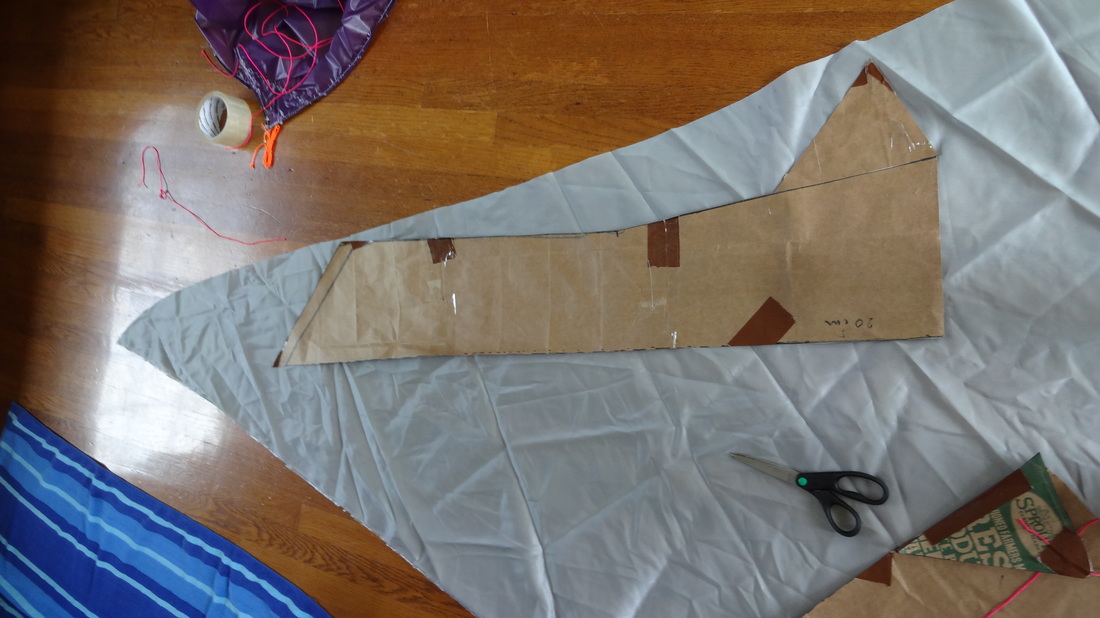
The process begins by downloading a series of illustrator files. Each template page comes with a 50mm square in the bottom right corner. By drawing a 50mm square in the work space you can use the scale tool to match the size of the squares. This brings the plans from an A4 size sheet of paper to real size. Once scaling is finished it was saved as a PDF and printed at 1:1 scale.
|
|
|
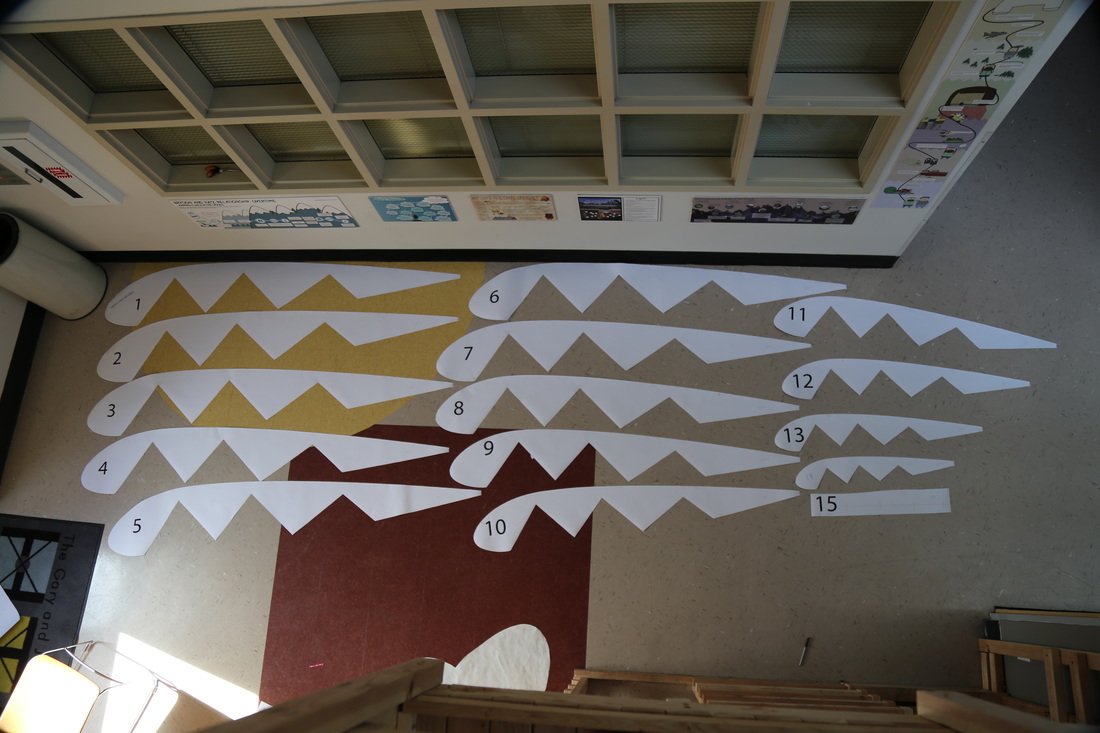
Once all of my templates were done I laid them out to determine exactly how much fabric to buy. Conveniently every three tiles on the floor was one meter which made measuring very easy. Fabric comes by the meter so I had to lay out all of my pieces no wider than three tiles. |
|
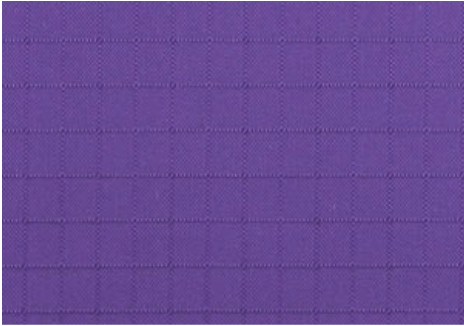
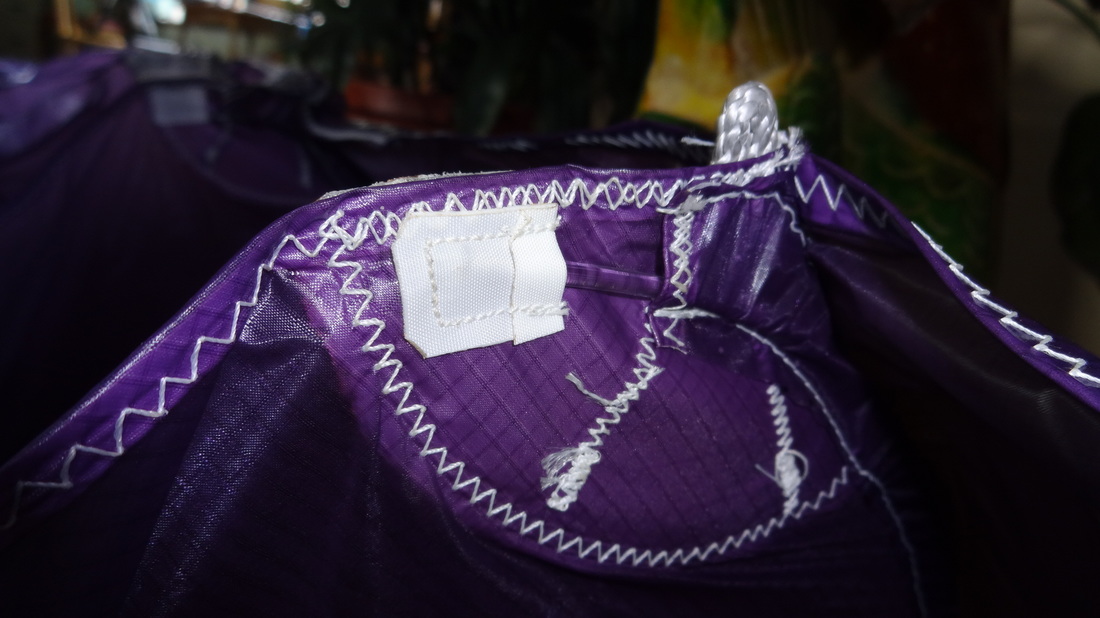
Choosing the right fabric for your paraglider is crucial. Initially I wanted to go to the fabric store and get the cheapest ripstop possible. Luckily, I rejected this idea when I came across a piece of cheap ripstop and was able to tear it in half effortlessly. As I did research I learned more and thus increased the life expectancy of the pilot drastically. Ripstop is a made of a fabric called taffeta. What makes it ripstop are the extra nylon reinforcements creating a graph paper pattern over the fabric which increases it's strength. There is an array of weights and options for each fabric. I chose a German made polyurethane coated (P-U keeps fabric from breathing and protects from sun damage) nylon ripstop weighing 37 grams per meter. Unlike the cheap ripstop, this one has a 400N breaking strength. |
|
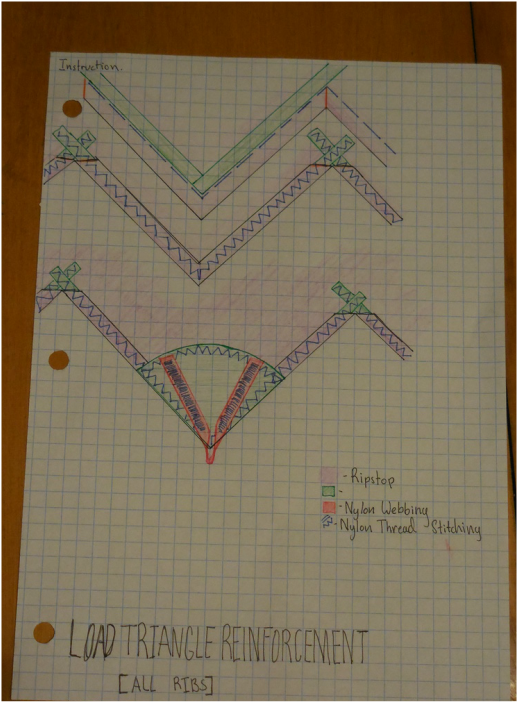
Load triangle concept:
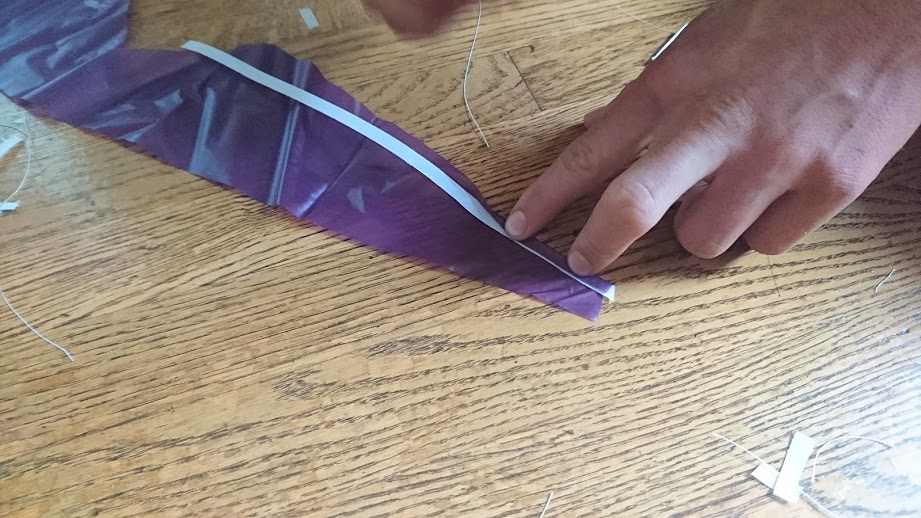
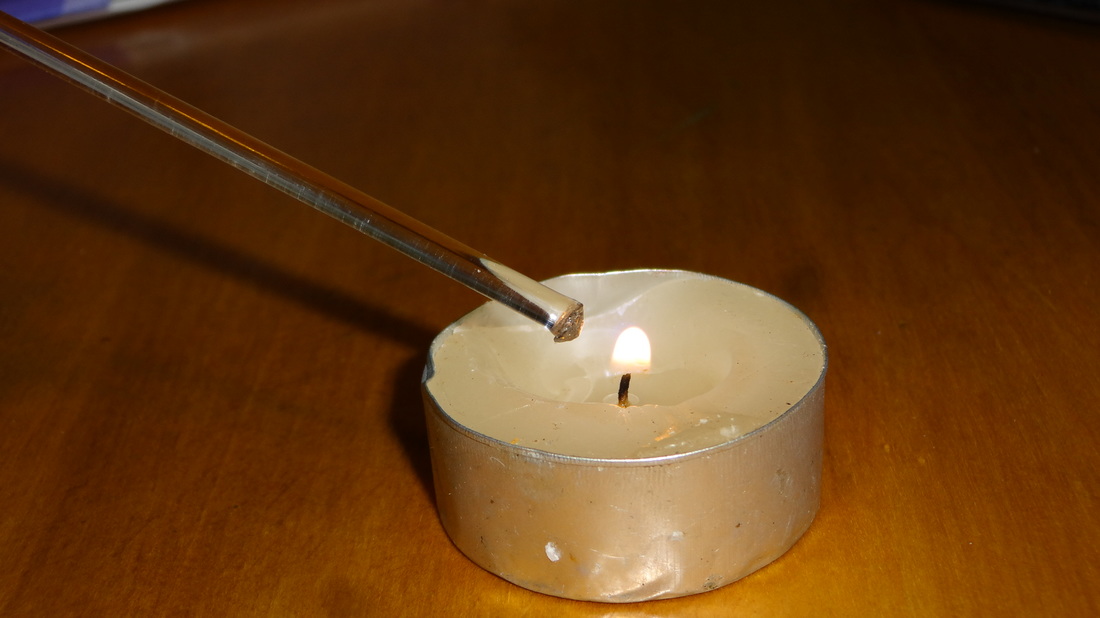
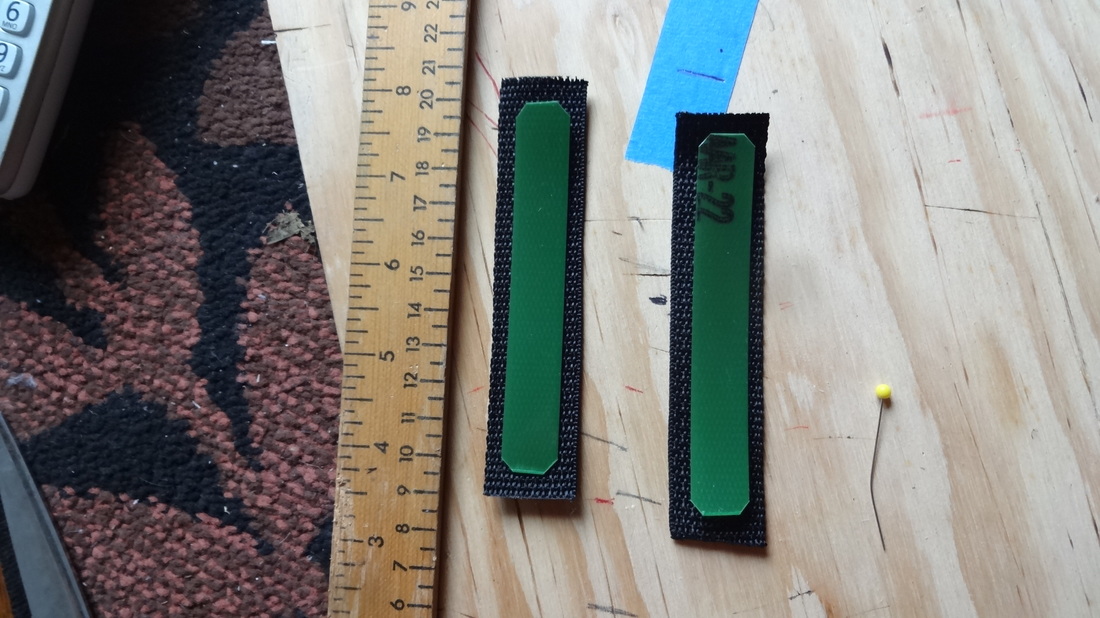
This week I found the material I want to use for the load triangle reinforcement. I brainstormed and drew up a detailed plan for the assembly of the load triangle. At a local sail repair shop i found an appropriate material for reinforcing the load triangle (green pieces below). The cloth I found was a 3/4 ounce polyester sailcloth. The cloth offered both rigidity and very high strength. To cut the sailcloth parts I used a modified soldering iron so that the the edges were melted together to prevent fraying.
Load triangle strength testing:
|
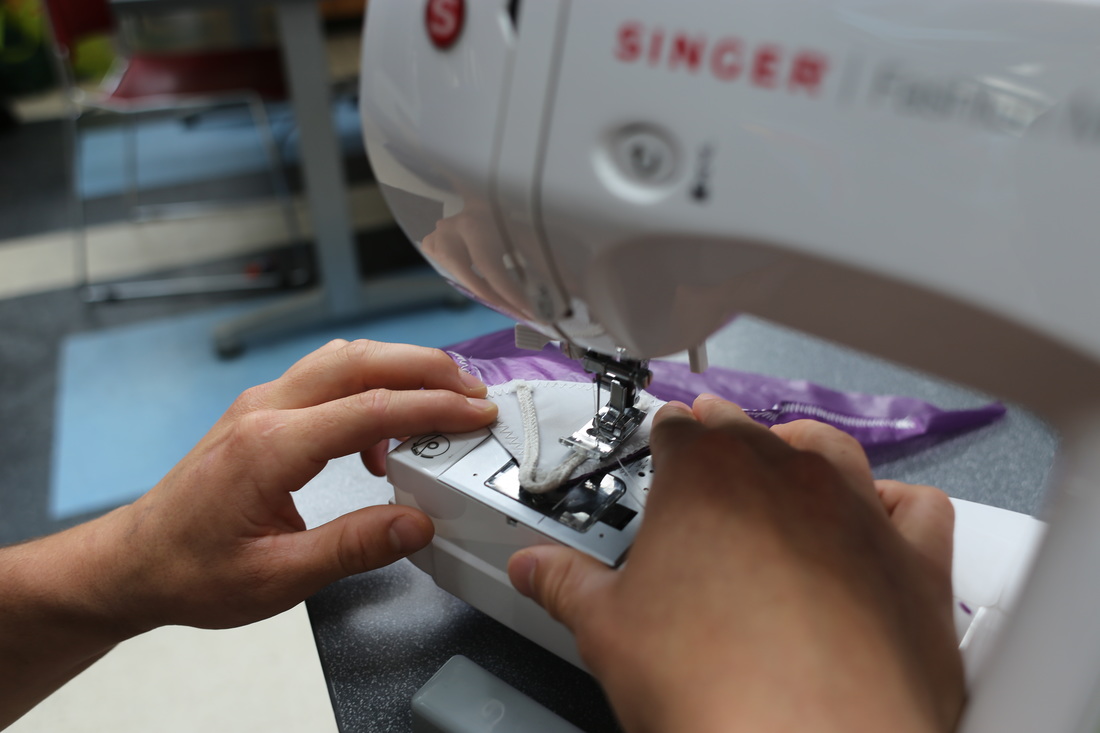
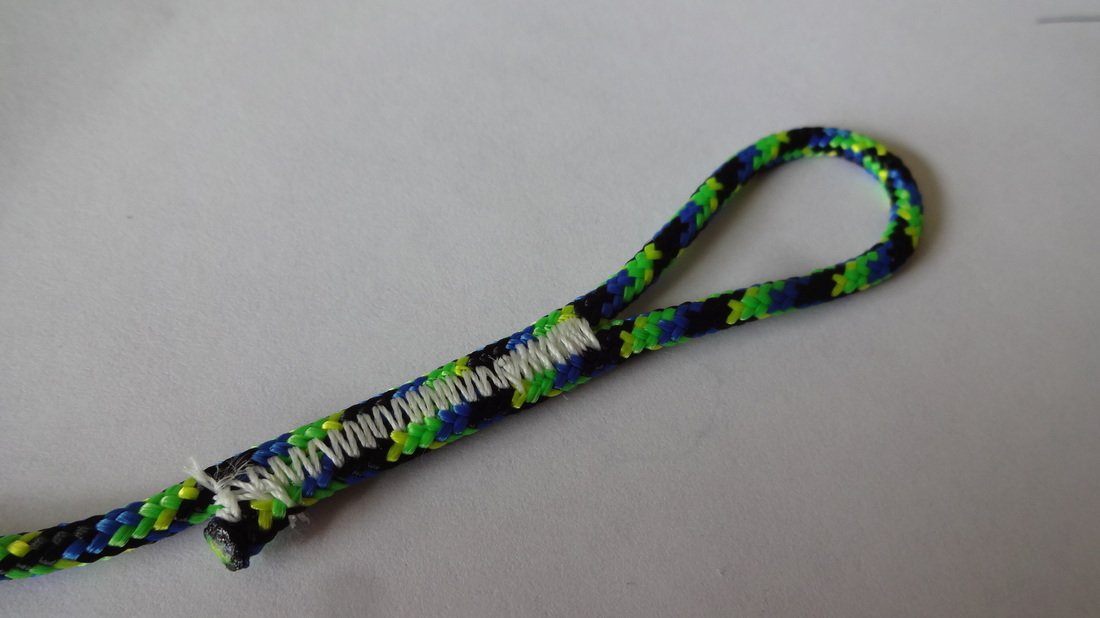
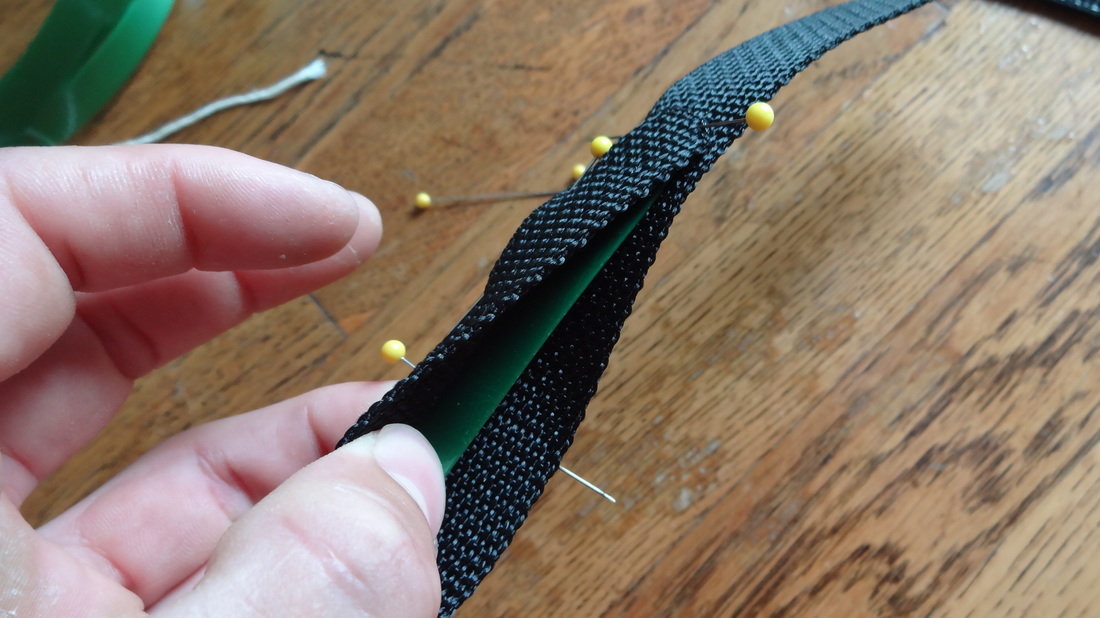
To test the strength of the load triangles I made a sample out of a piece of scrap. Using 6.25mm ribbon and semicircles of polyester sailcloth I reinforced the edges and bottom of the load triangle. I used an extremely strong, 69 weight UV-resistant nylon sail thread to stitch the components together. |
|
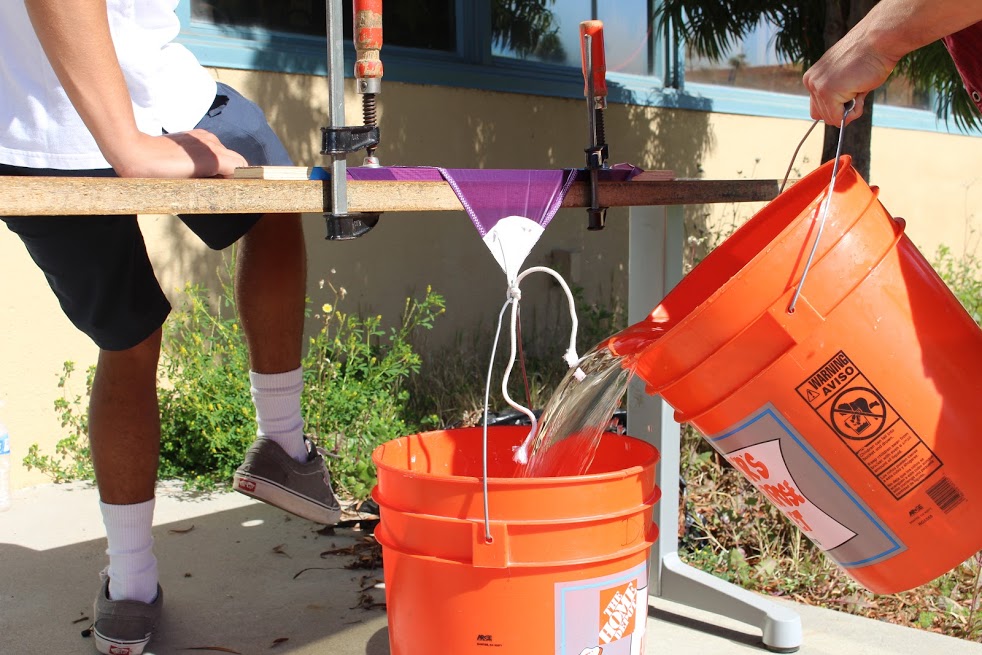
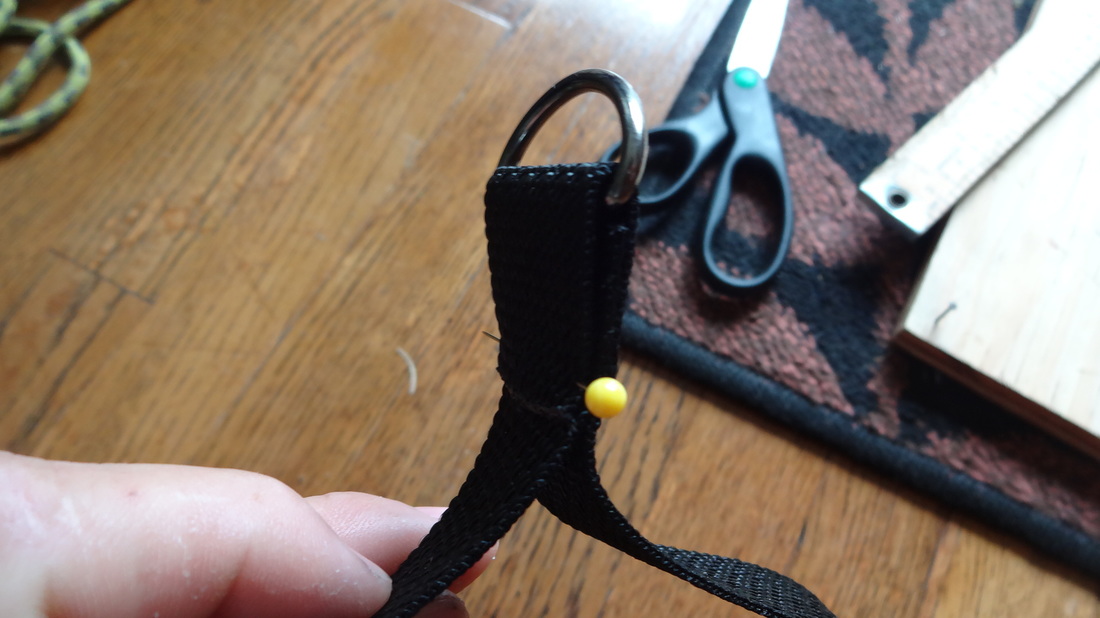
The next step was to calculate the breaking strength of the prototype load triangle. To accurately determine how much the triangle could hold I gradually filled a five gallon bucket tied to the load loop with water. Water weighs 3.78 kilograms per gallon so a full bucket would weigh 18.9 kilograms. |
|
|
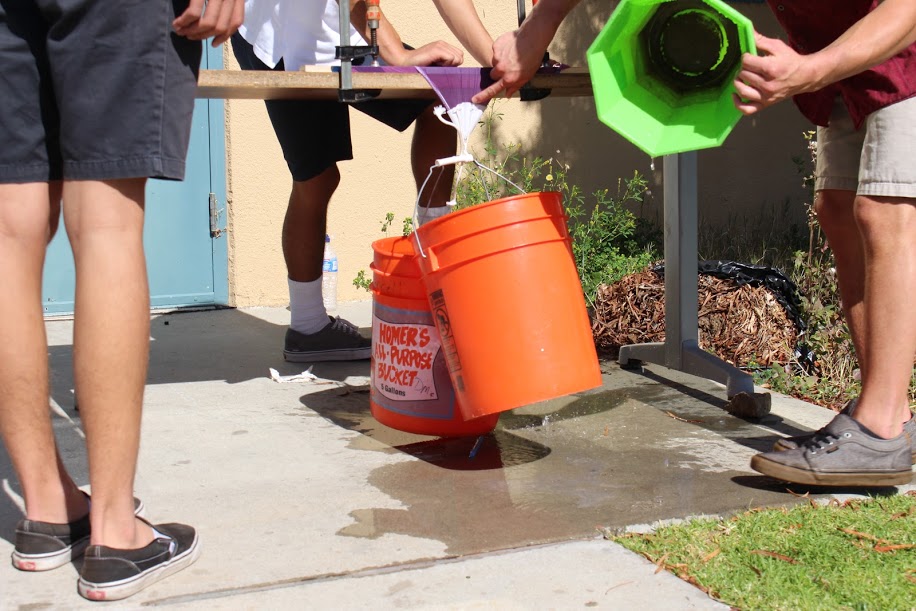
Unable to break the fabric with one full bucket I attached another and filled it completely. Realistically the most weight the triangle would ever have to withstand in normal flight would be around .9 kilograms (my weight/120 load triangles under 2G's of force). The load triangle showed no visible damage at 37.8 kilograms. I went on to hang from it (70 kilograms) where it continued to hold strong. |
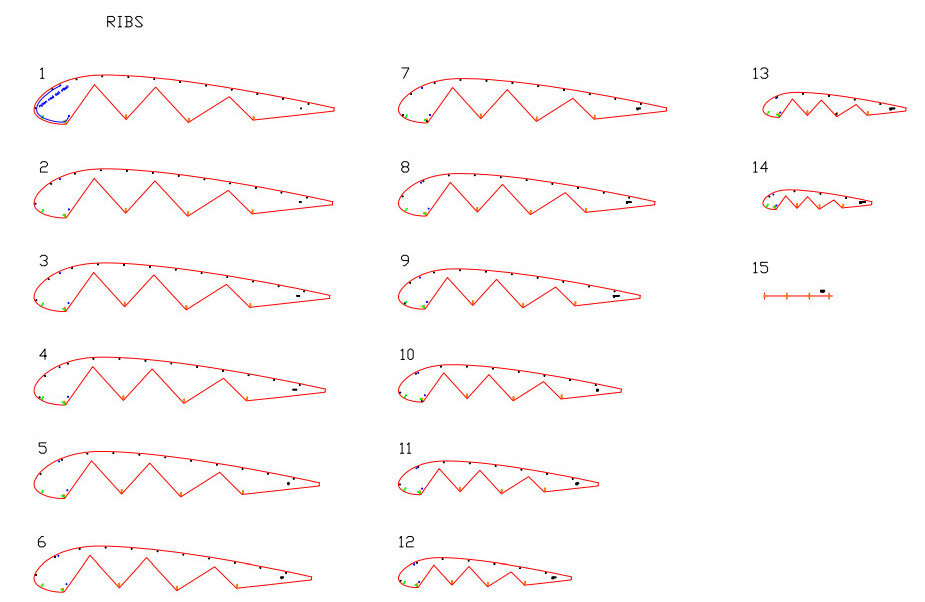
Reinforcing ribs:
|
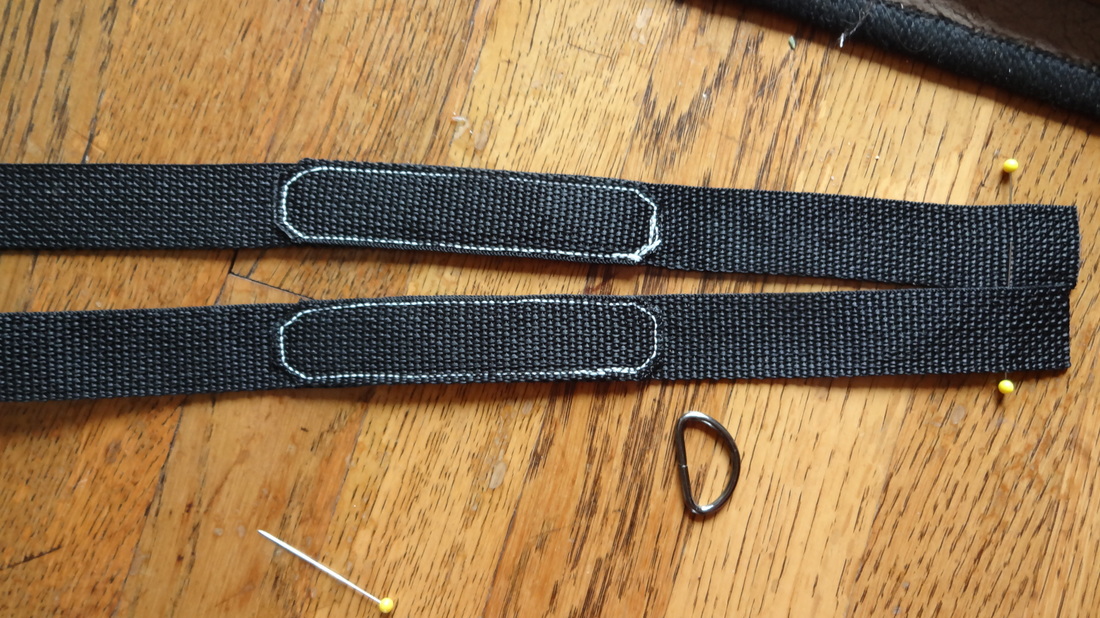
All ribs used 6.25mm polyester sailcloth ribbons for reinforcement. |

|
|
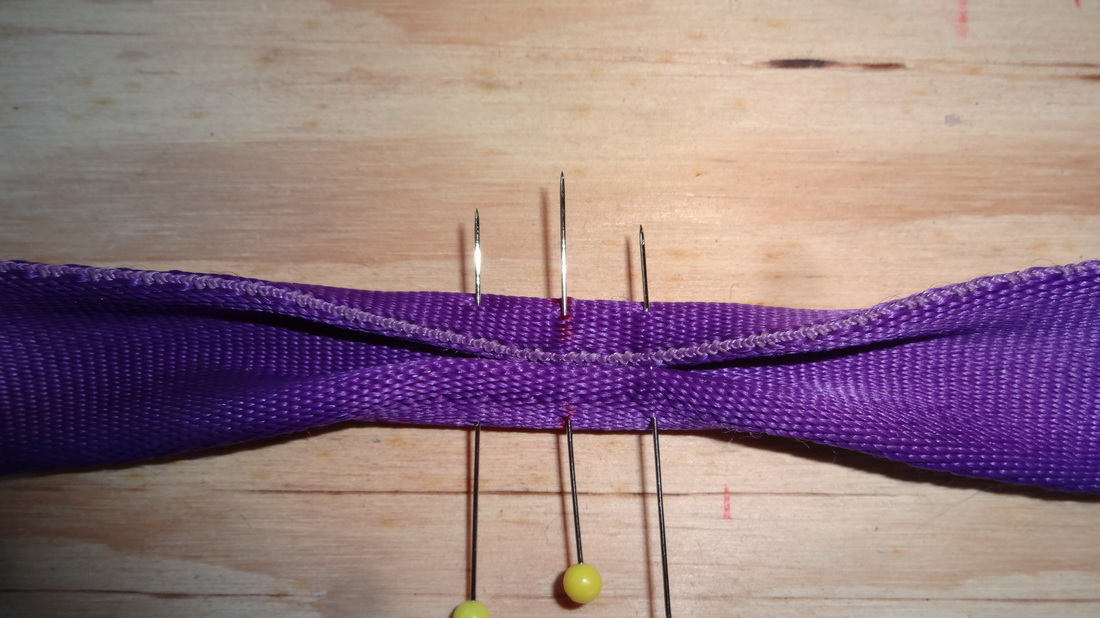
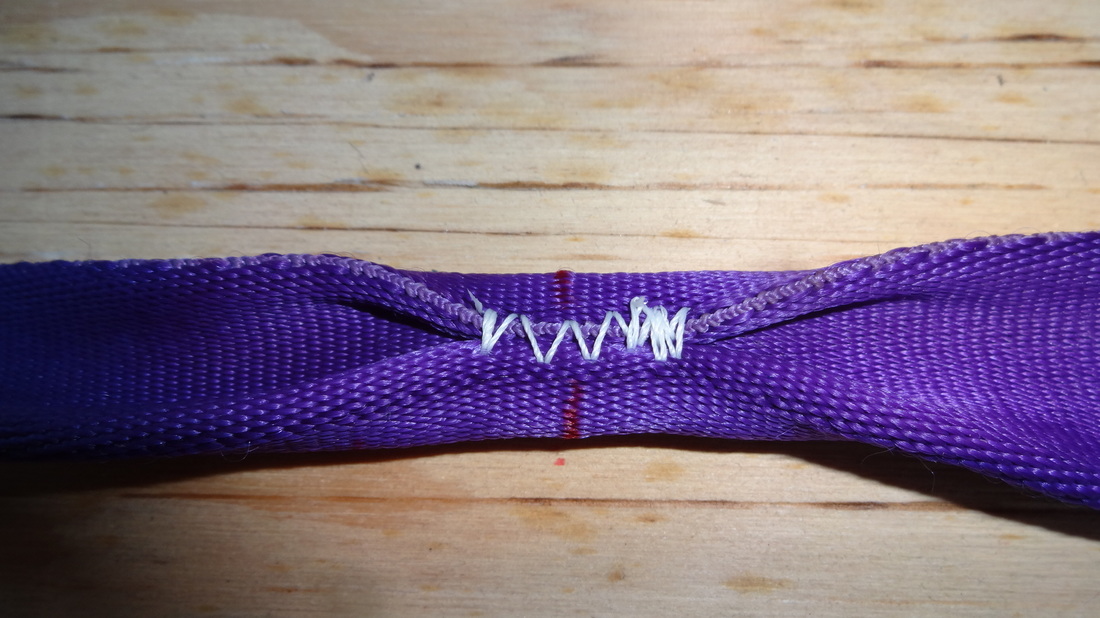
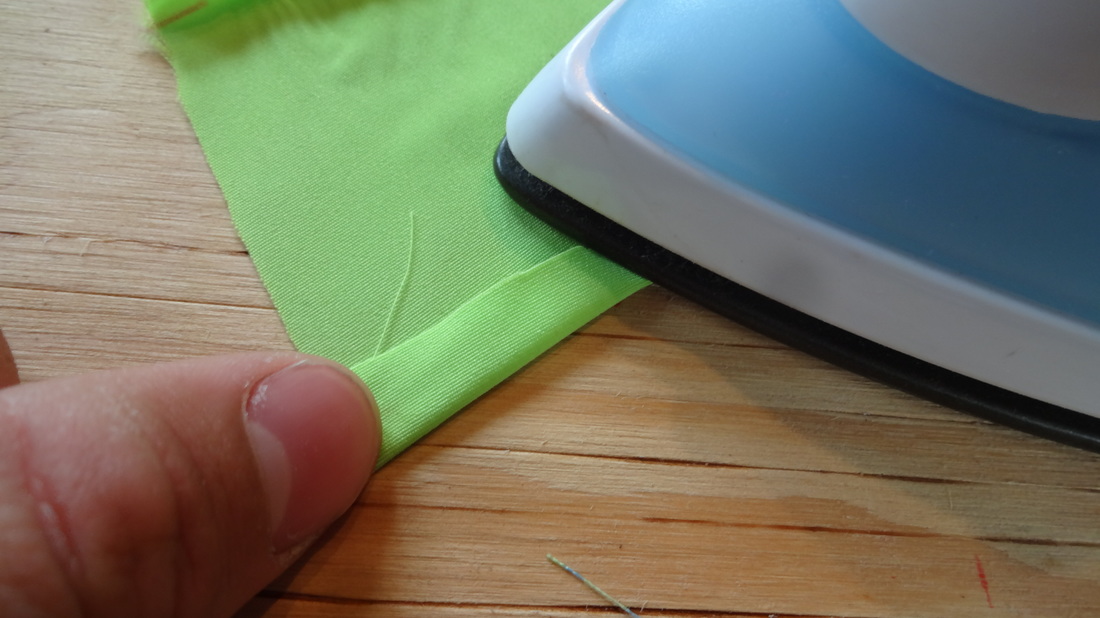
To reinforce the underside of the rib i folded and pinned the ripstop over the ribbon. Next I sewed it in place using a zig-zag stitch ideal for high tension. |
Finished rib
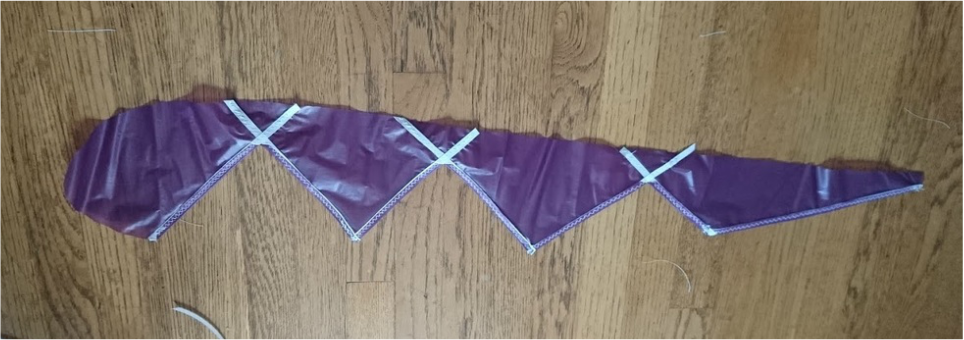
Load triangle semicircles:
|
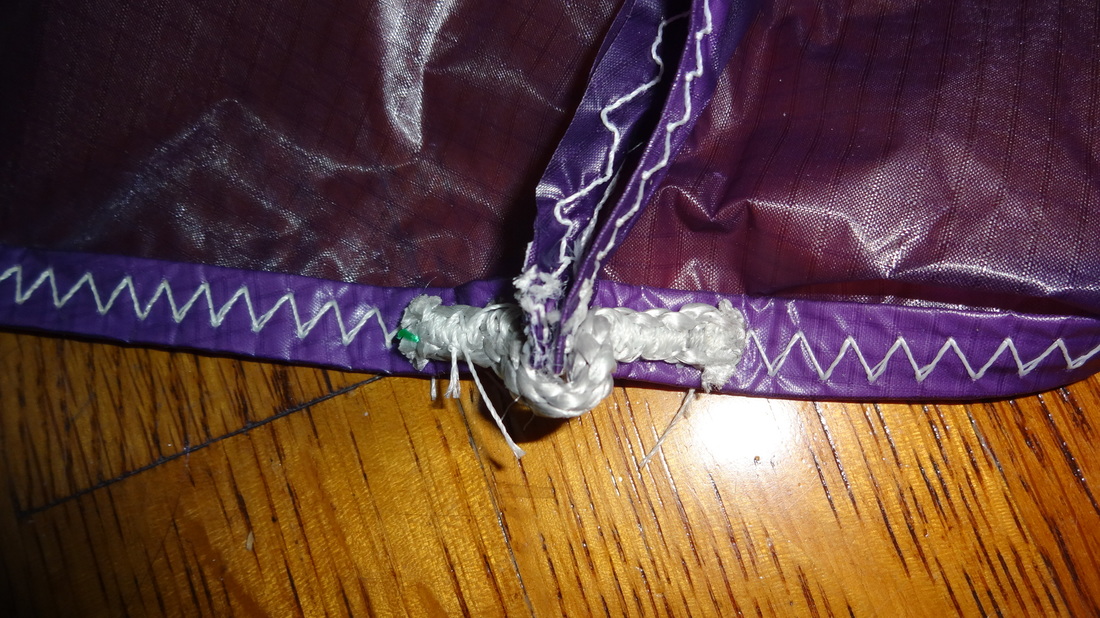
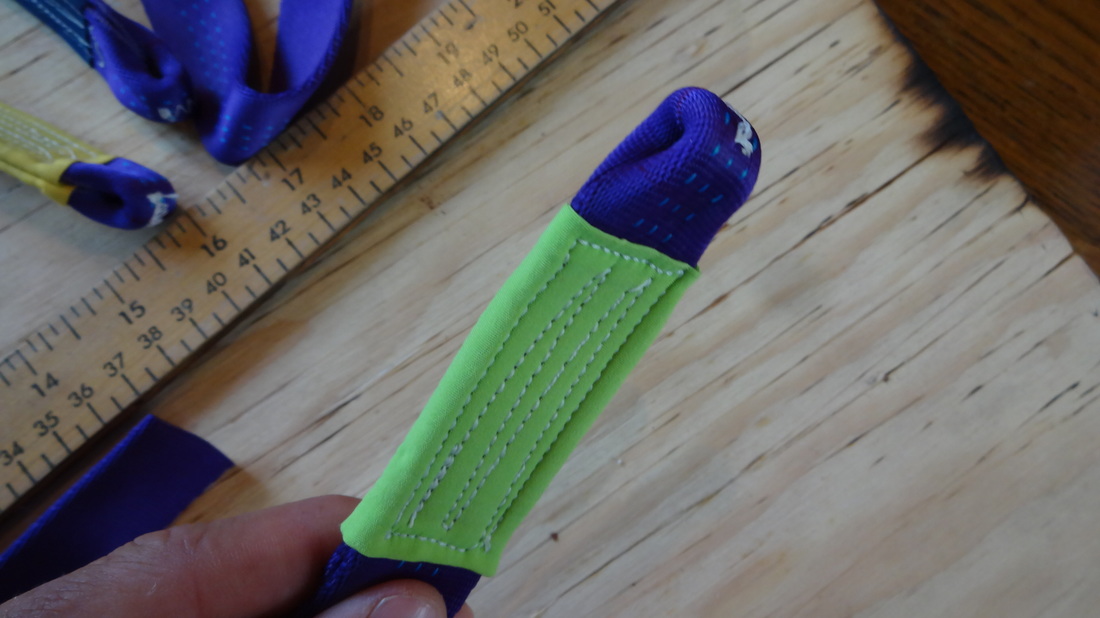
After all 29 ribs were reinforced with ribbon I stitched on 116 semicircles. It is important to sew the leading edge semicircle 12mm from the edge of the leading edge so that it doesn't get in the way when the ribs and panels are sewn together. After this each triangle received a 15cm loop of Amsteel Blue polypropylene cord (break strength: 1133 kilos) to complete the load triangles. |

|
|
|
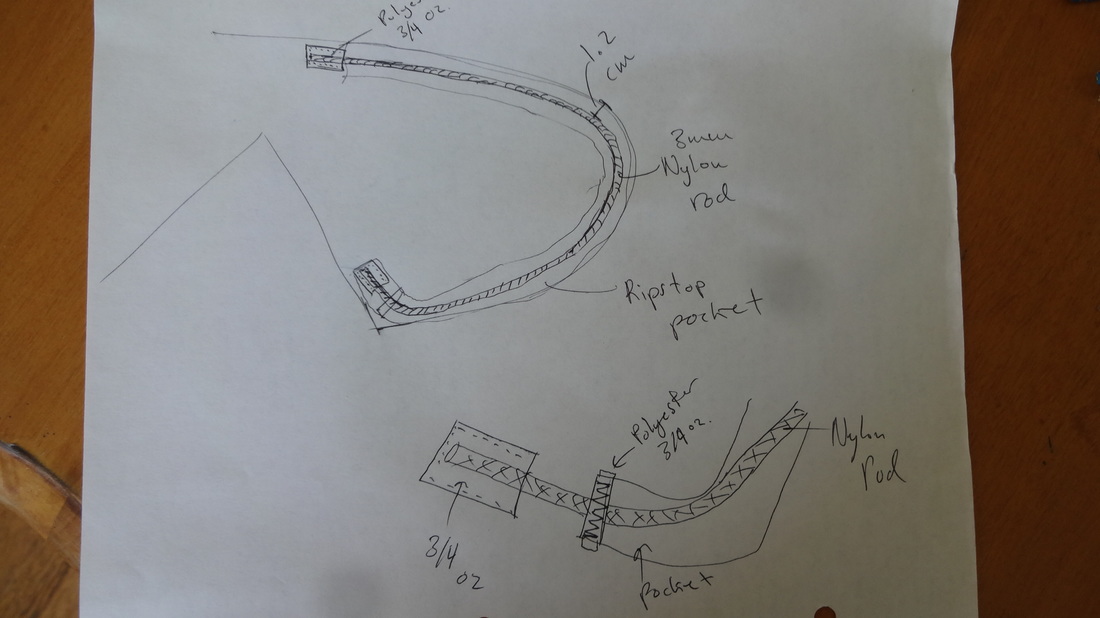
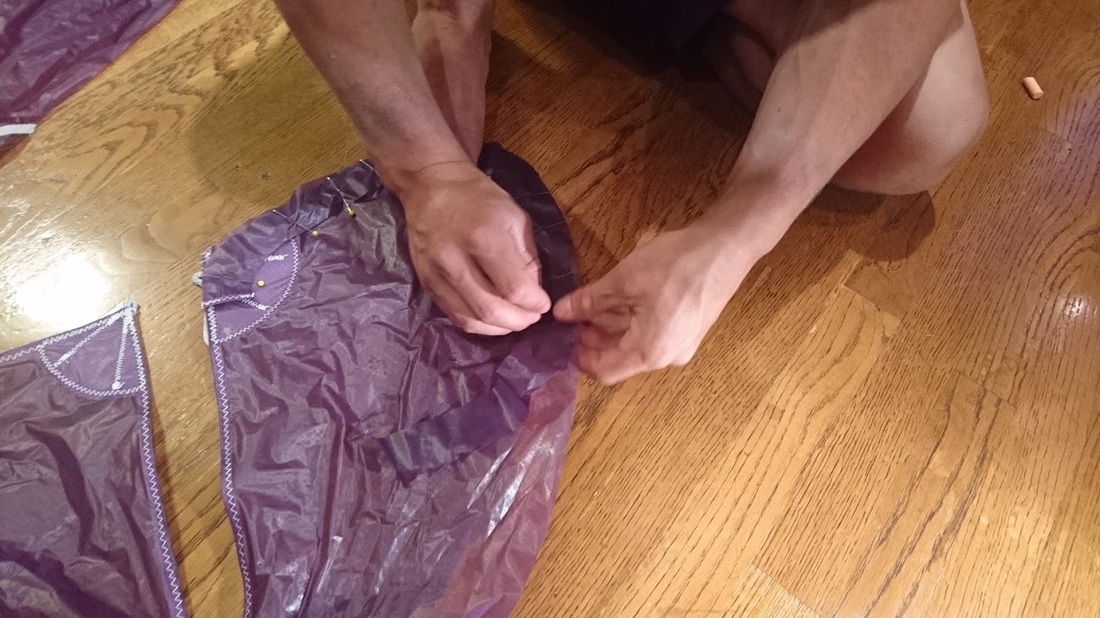
Sewing pockets for nylon rods:
|
Rigidity in the leading edge of the wing is important. In order to do this I made a pocket in the leading edge of each rib for a nylon rod to be slid into. The springiness of the rod keeps the airfoil open, similar to the way a tent is supported by its poles. |
|
|
Preparing to sew a pocket |
Reinforcing panels:
|
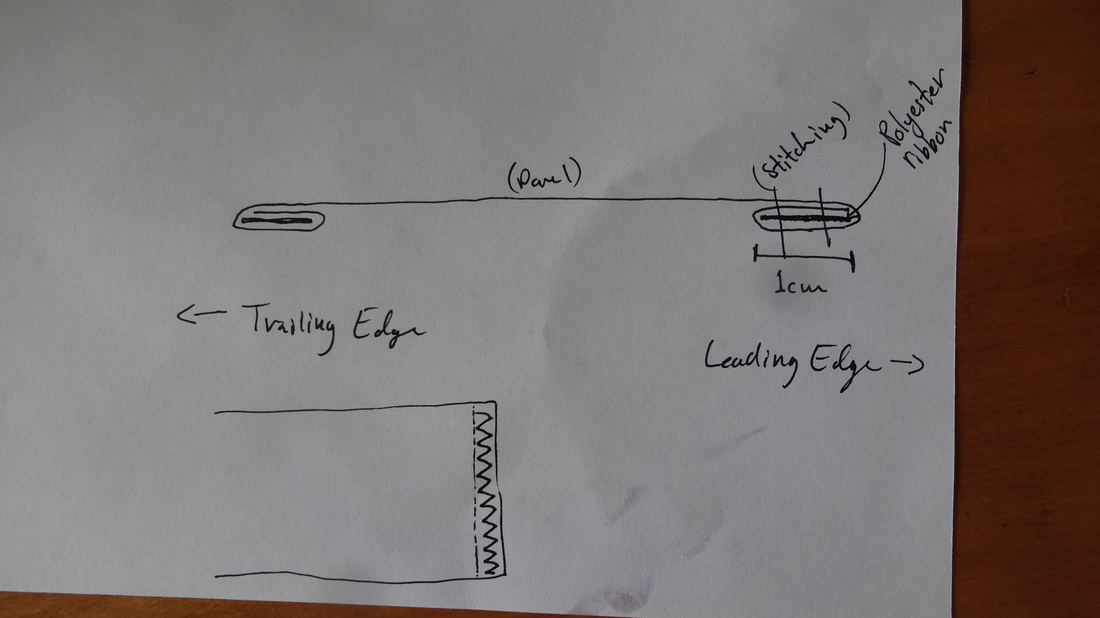
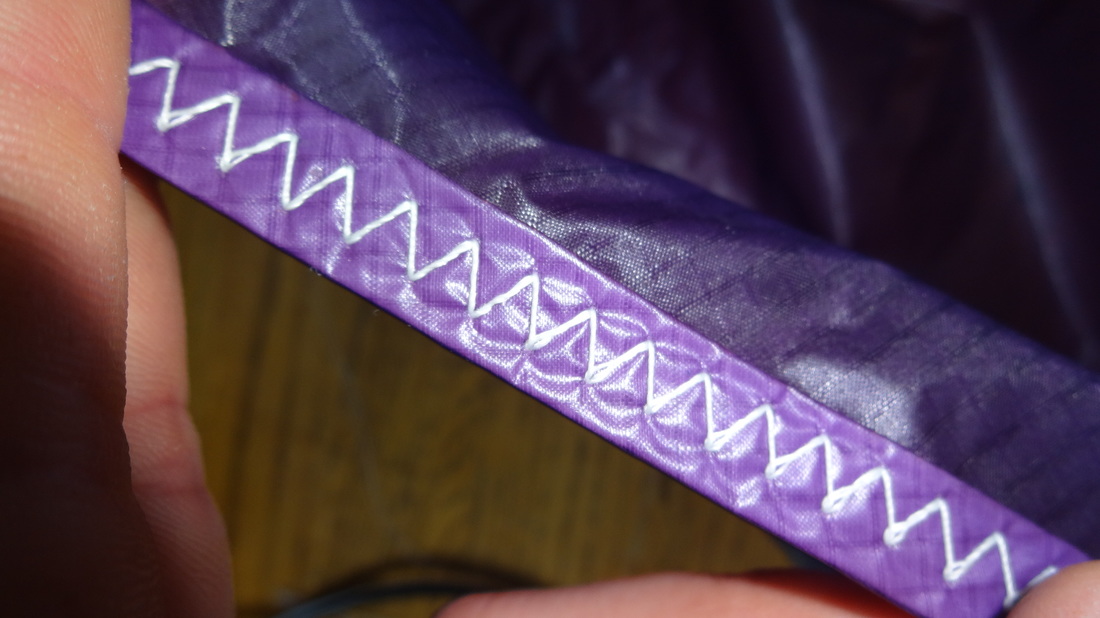
When the wing is inflated tension develops on the leading and trailing edges from wing tip to wing tip. This tension keeps the wing rigid. Because there is so much tension on these lines they need to be extra strong. I reinforced the leading and trailing edge of each panel with 1cm ribbon of sailcloth. |
|
Sample of trailing edge |
|
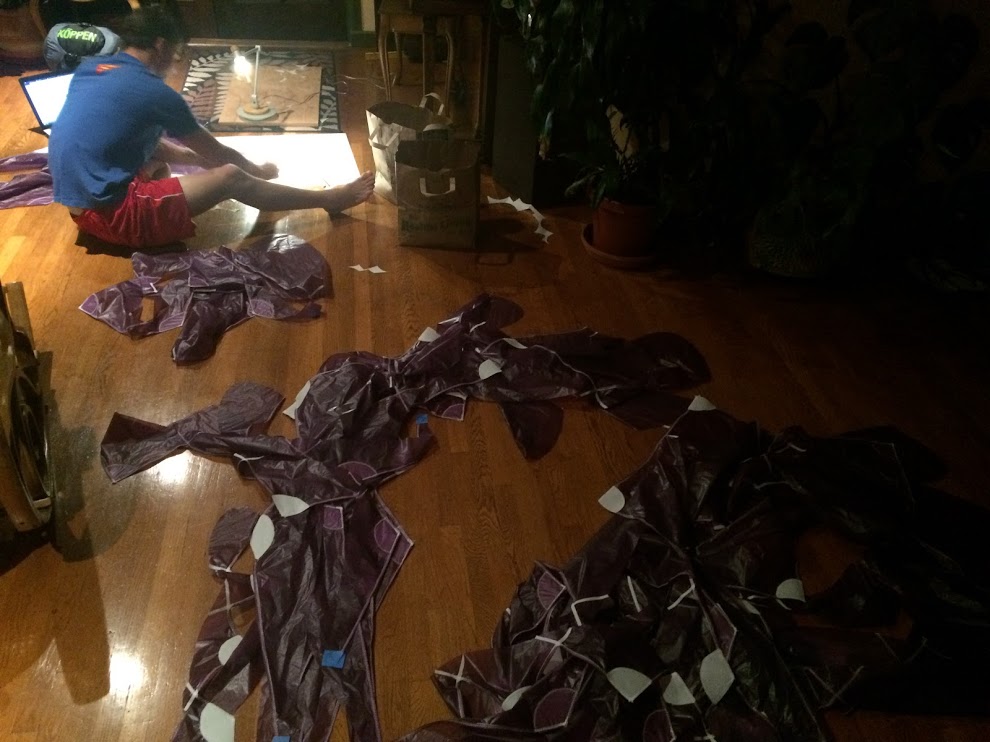
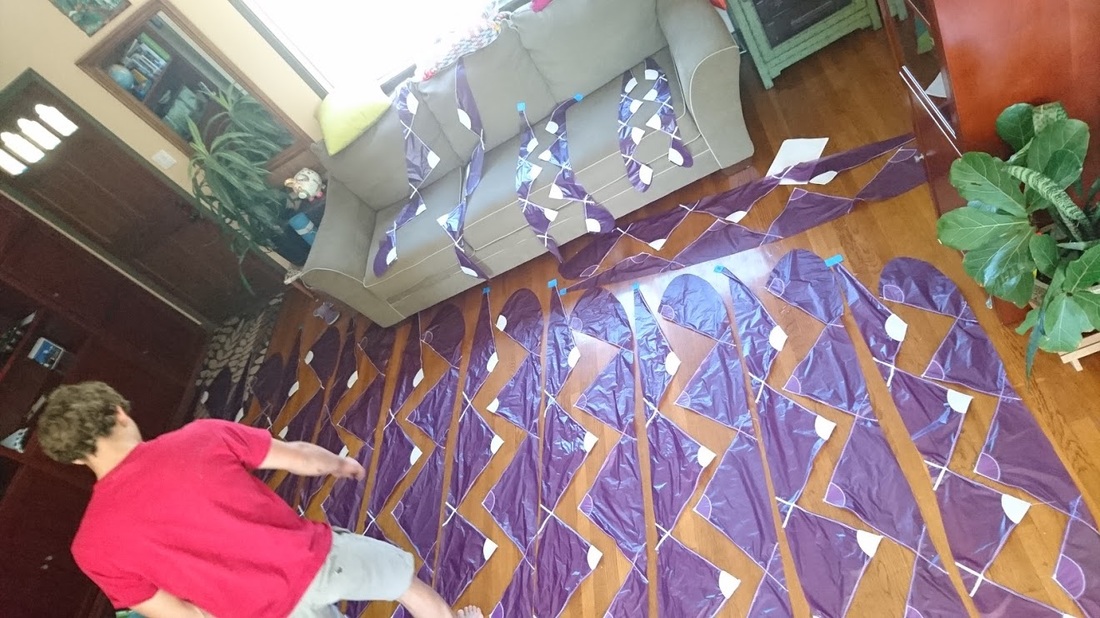
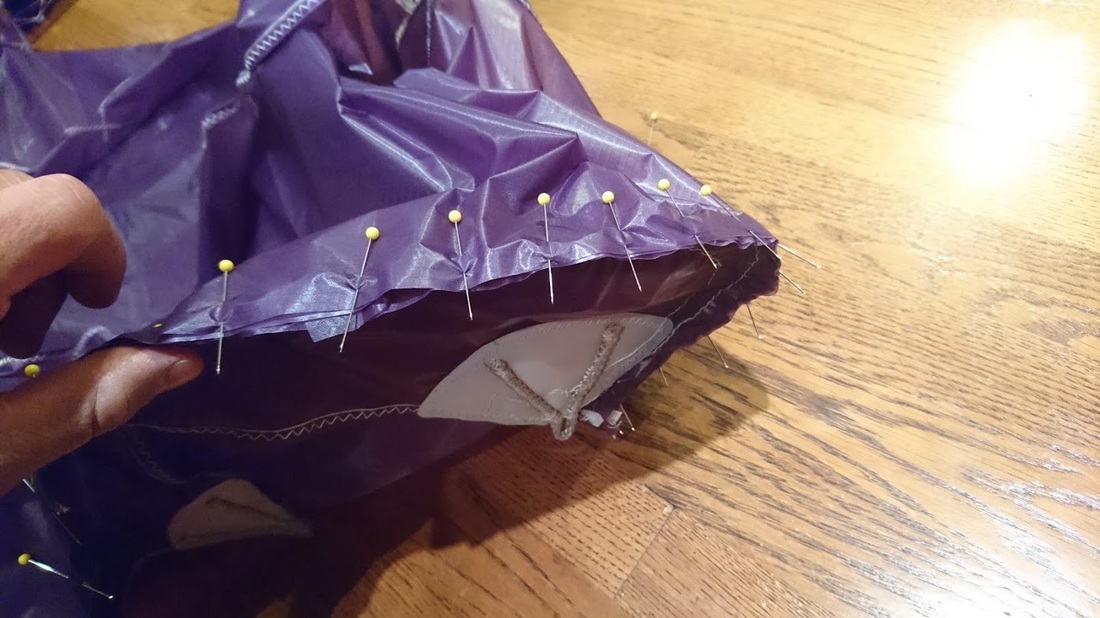
Joining ribs and panels:
The next step was to sew the panels and ribs together. The stitches in a straight line on the right side of the drawing are the outer layer of stitches, meaning the wing would take the shape of this line. The zig-zag stitches are a safety measure. If the first line of stitches was to tear, the panels would be held together by these stitches.
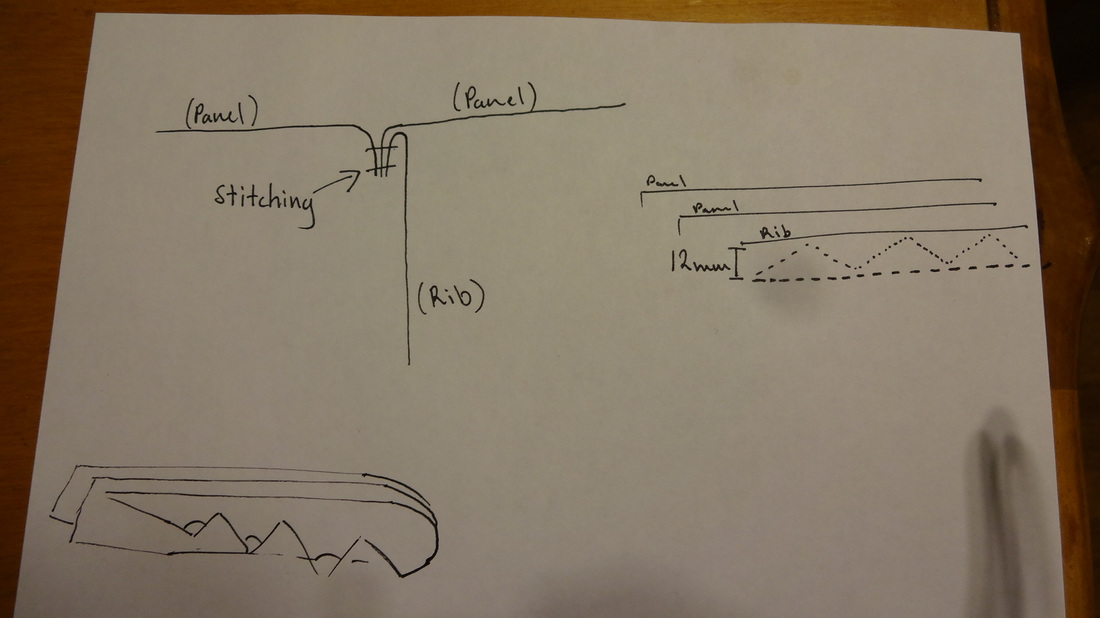
Choosing the proper stitch length is very important. If the stitches are too far apart, there will be too much stress on each individual thread. On the contrary if the stitches are too close together you are creating a perforation in the fabric and it is much more likely to rip. To find the middle ground I made a series of stitches in scrap pieces of fabric and tried to tear them. |
Preparing to sew rib and corresponding panels together 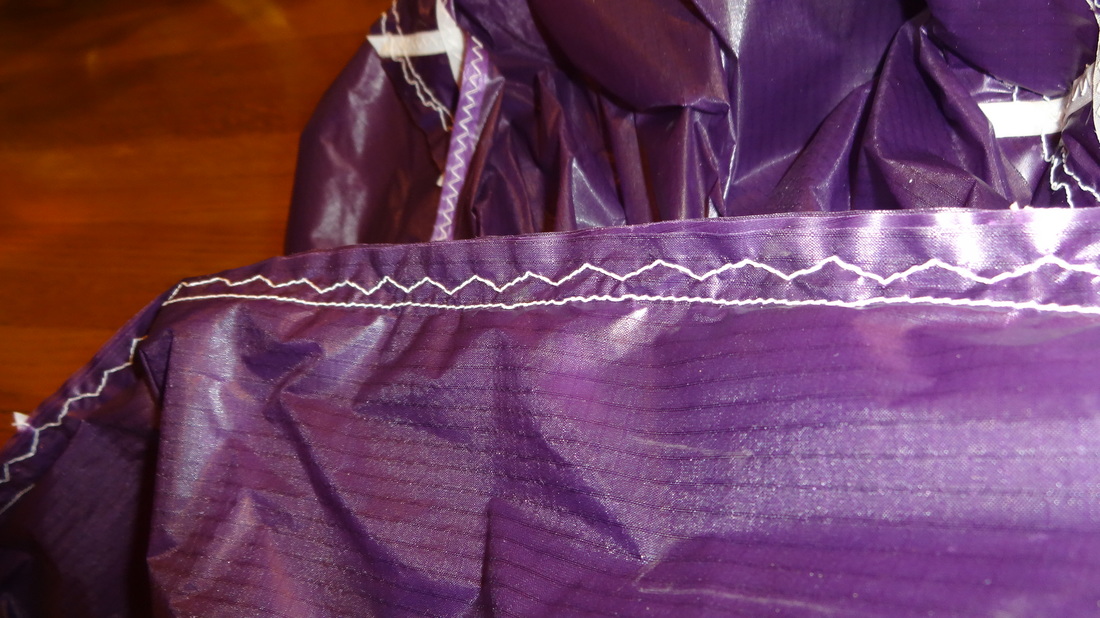
|
Inserting nylon rods to kite:
|
It is important to round the tips of each baton to keep them from tearing the fabric when pressure it applied. |
Brake loops:
Para-gliders turn, slow down, and land (stall the wing) using brake lines. When pulled, the brake lines create a controlled collapse of the trailing edge of the wing. For example, when the right brake line is pulled, there is a partial collapse of the right side of the wing, which creates less lift and more drag which results in a right turn.
Lines: |
|
|
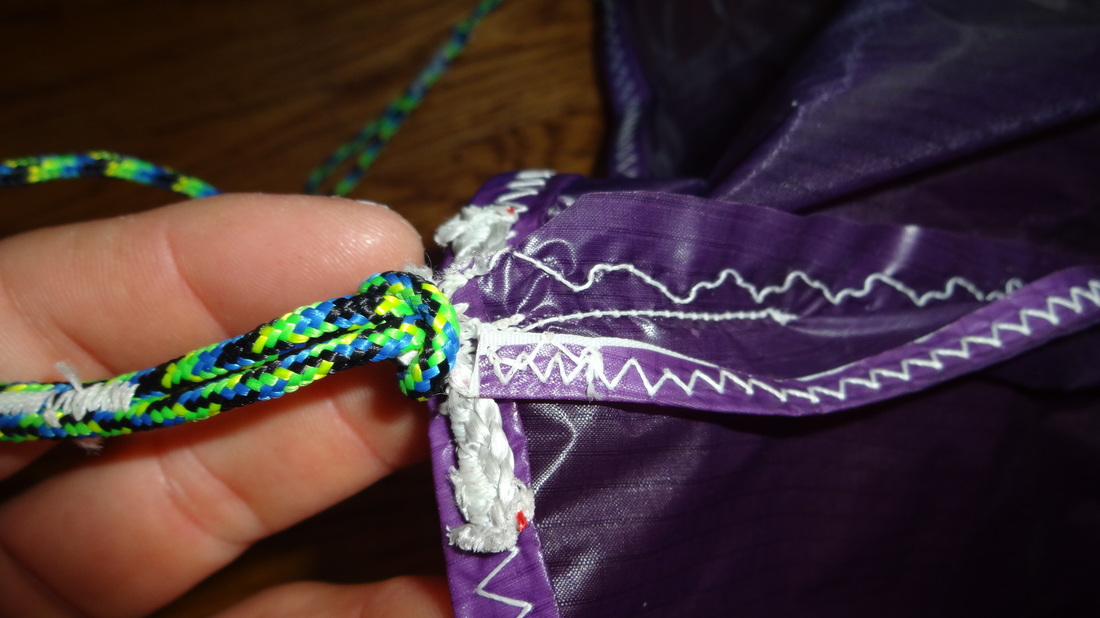
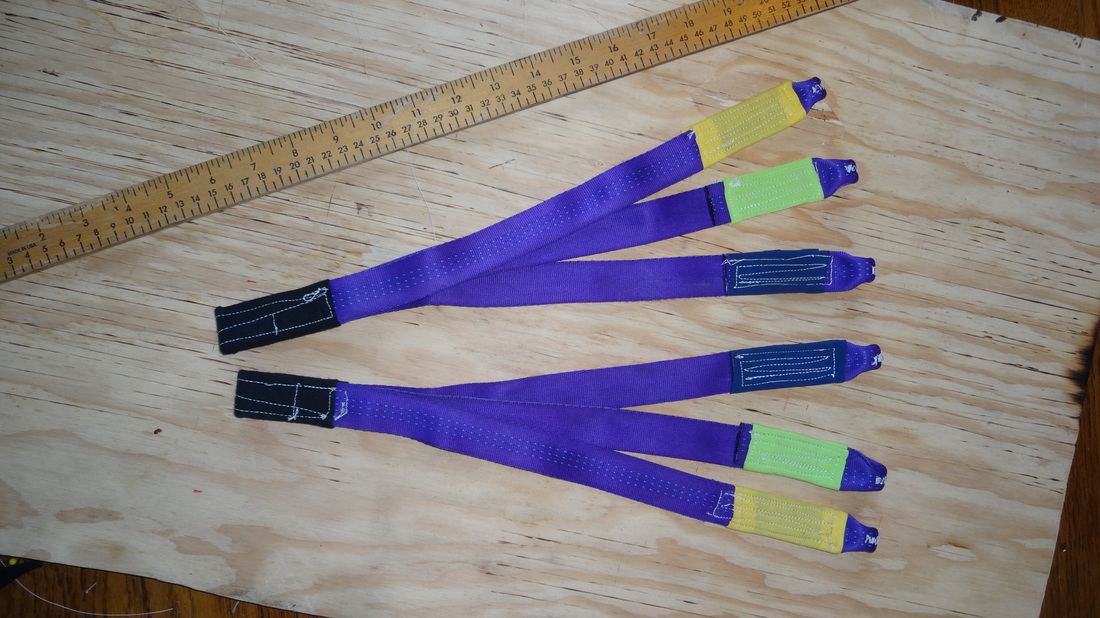
This para-glider has 236 lines which need loops sewn at both ends of each line in very precise lengths. This means 472 loops need to be sewn total. |
|
|
|
Risers:
Risers connect the lines to the harness and provide a place for the brake handles to be attached. This model has three risers attaching to each of the three mainlines coming down. The risers also provide a comfortable place to hold onto while lifting the glider off the ground.
|
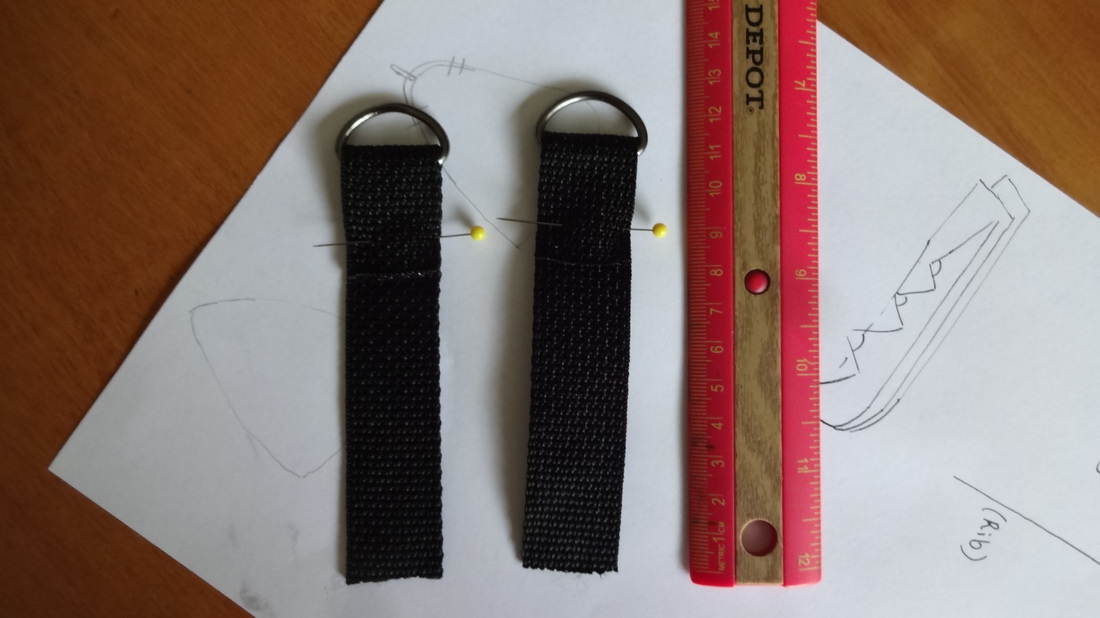
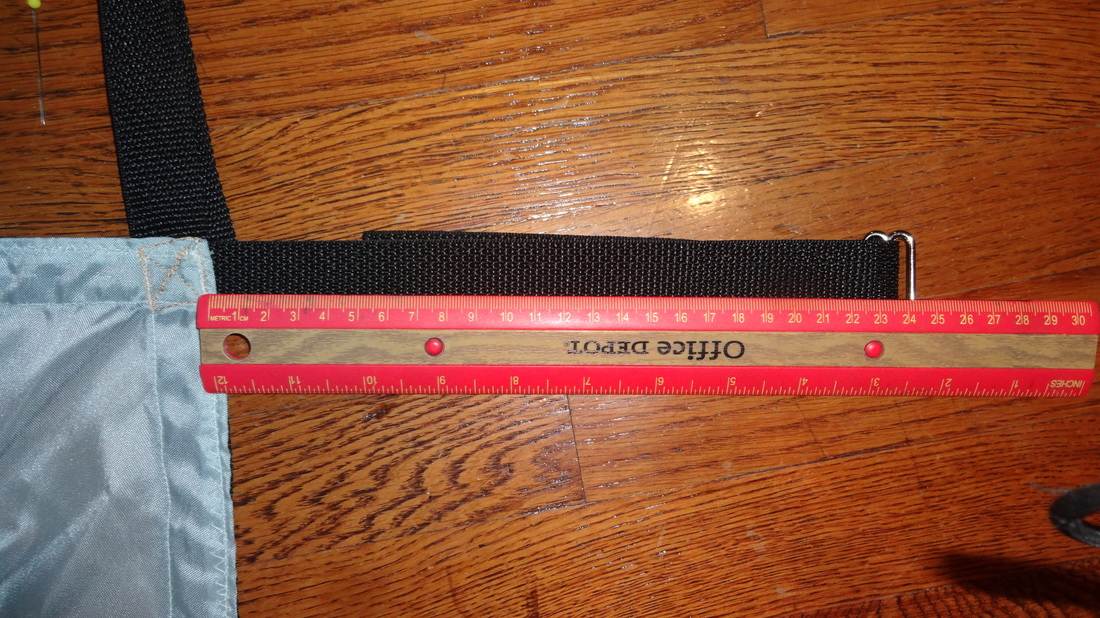
I wanted 38cm risers so I marked the center of the loop at 40. In order to let a mini carabiner sit nicely I made the webbing loops narrower. To do this I pinned a 2cm section where I wanted the loop and sewed it together. |
|
|
In order to keep things organized and simple I color coordinated the loops with the corresponding lines. |
|
|
Finished green loop |
|
Finished risers without brake lines |
|
|
The brake lines will run through these D rings. The tabs will be sewn onto the outer riser (blue). |
|
To make the brake handle keep its shape I used a piece of plastic strap used to bundle lumber together. |
|
|

|
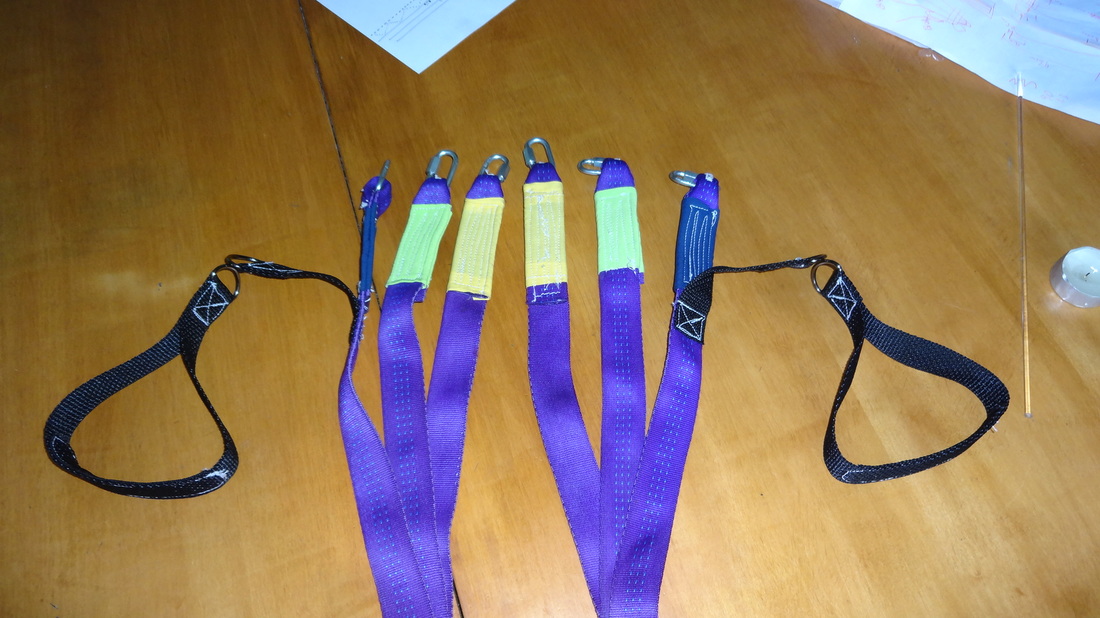
Finished risers
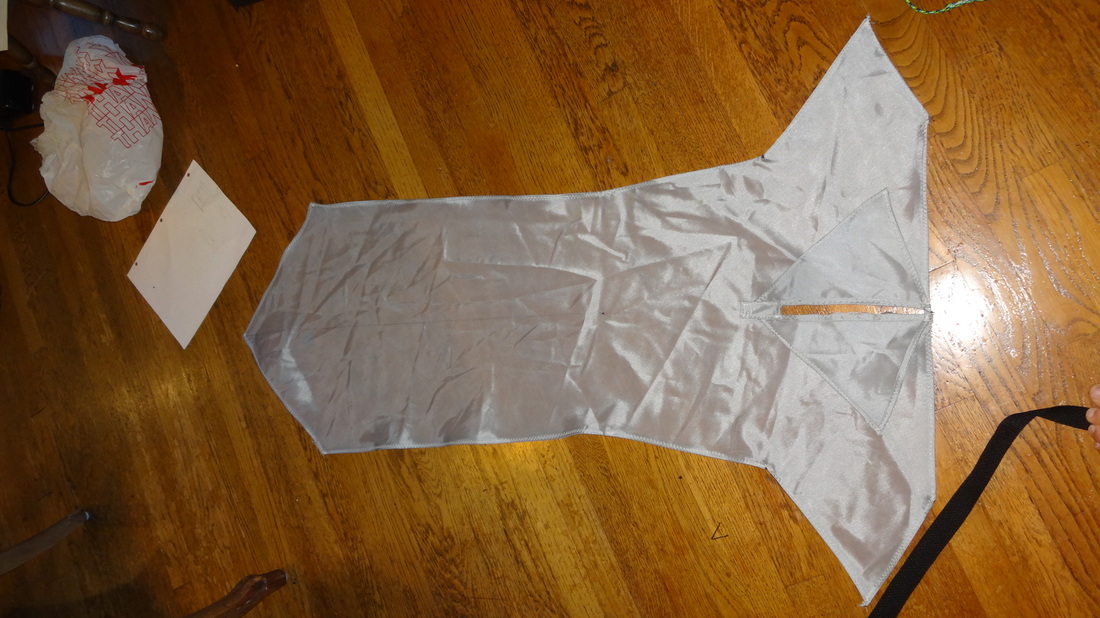
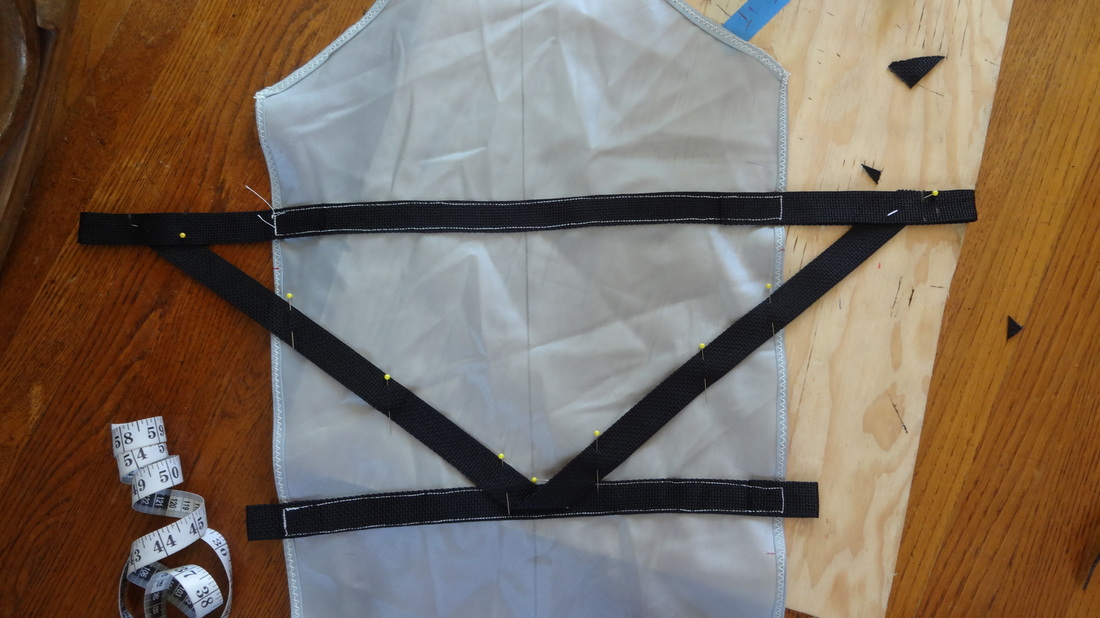
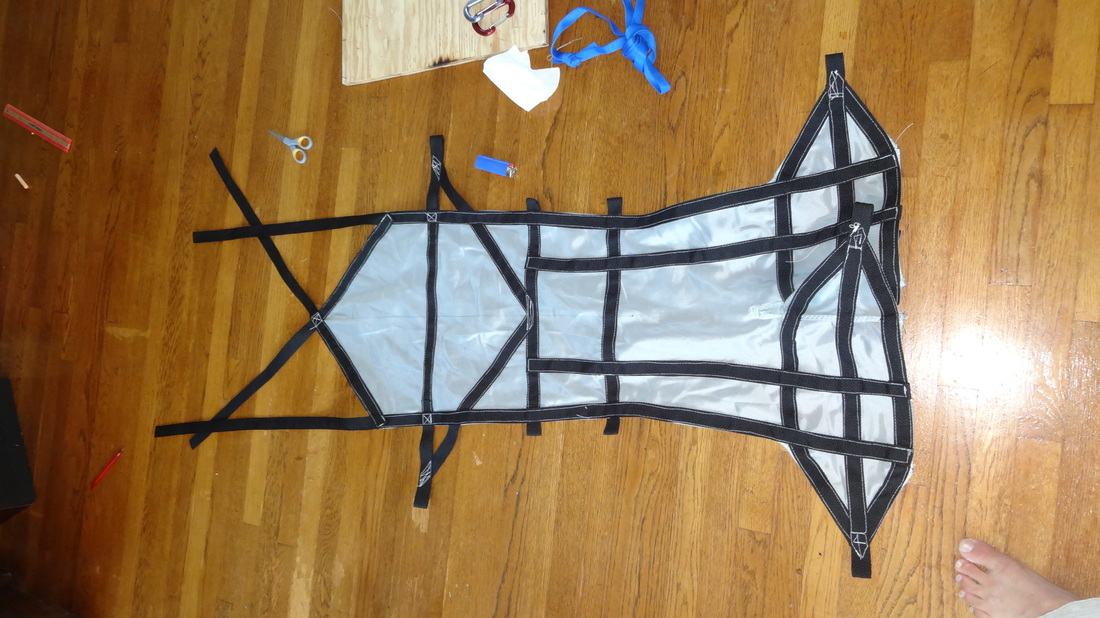
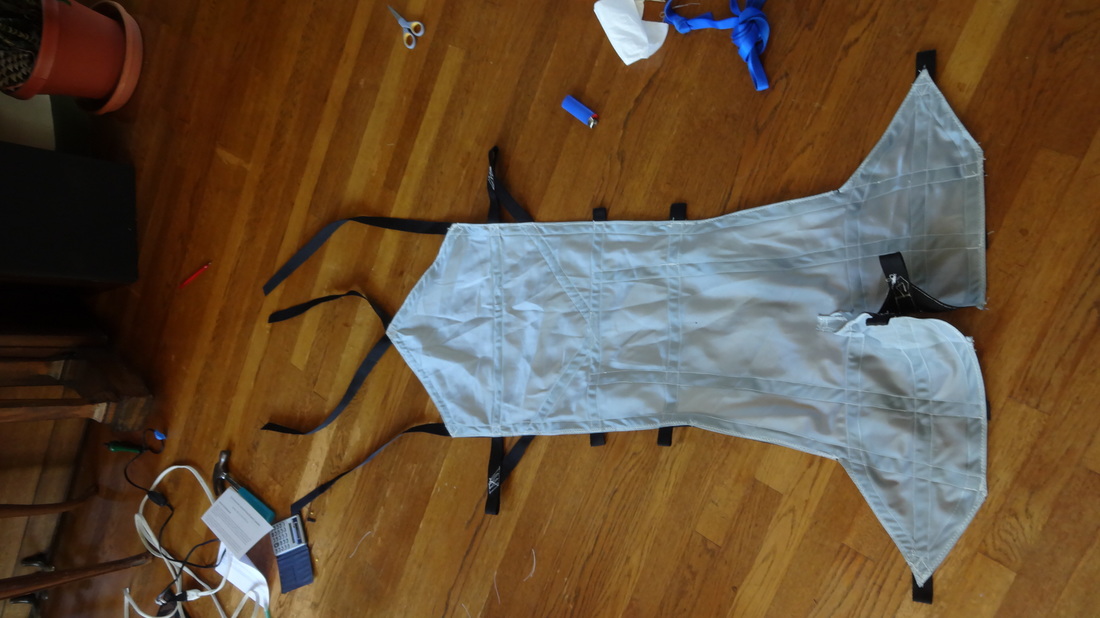
Harness:
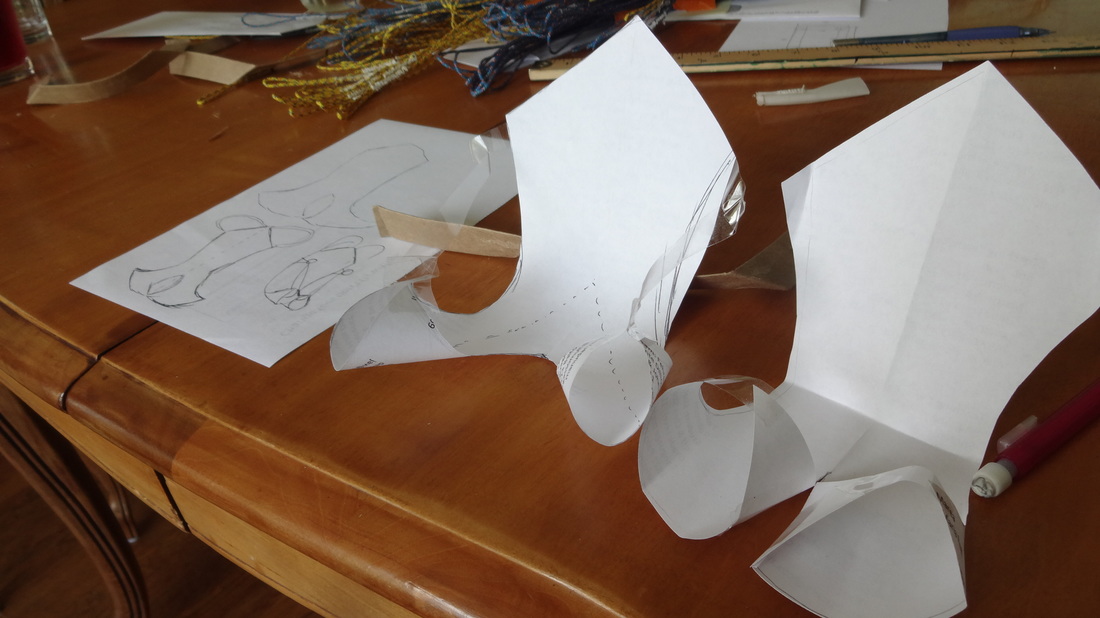
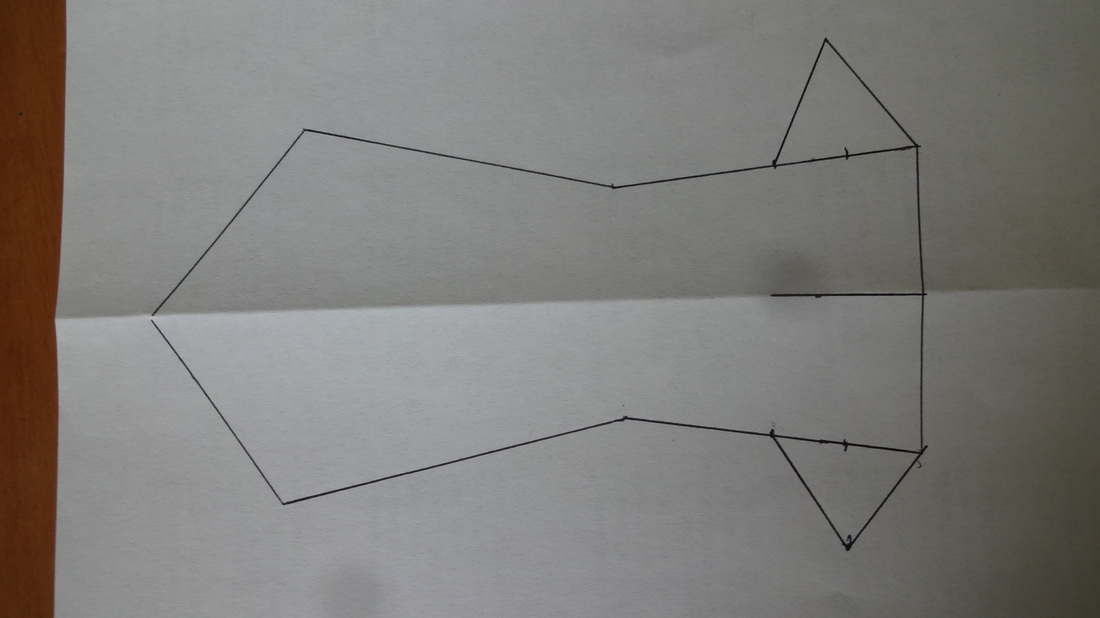
Unlike the majority of the para-glider plans, there were no online patterns for a harness. Originally, i was going to buy one or scavenge one off of something else. Unfortunately, they are incredibly expensive and a different type of harness was not practical. Instead I decided to start from nothing and create my own harness.
|
Preliminary drawing and design progression |
|
Next draft |
|
|
Full size pattern based off my body |
|
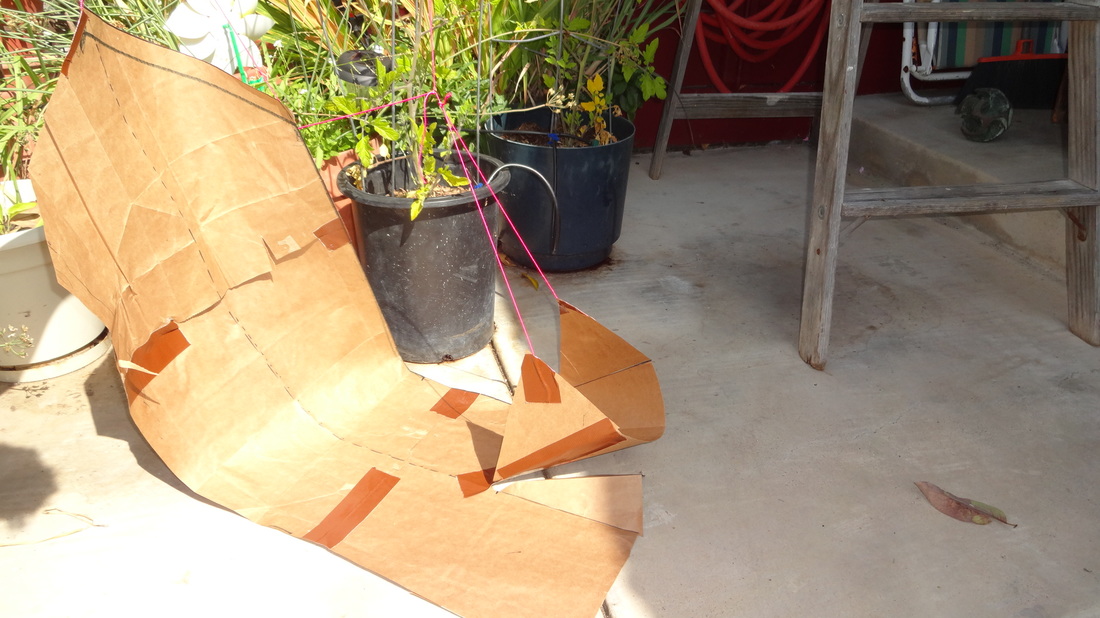
Pattern cut in half to ensure symmetry |
|
|
Inside leg load triangles cut with excess fabric around edges |
|
Full harness |
|
|
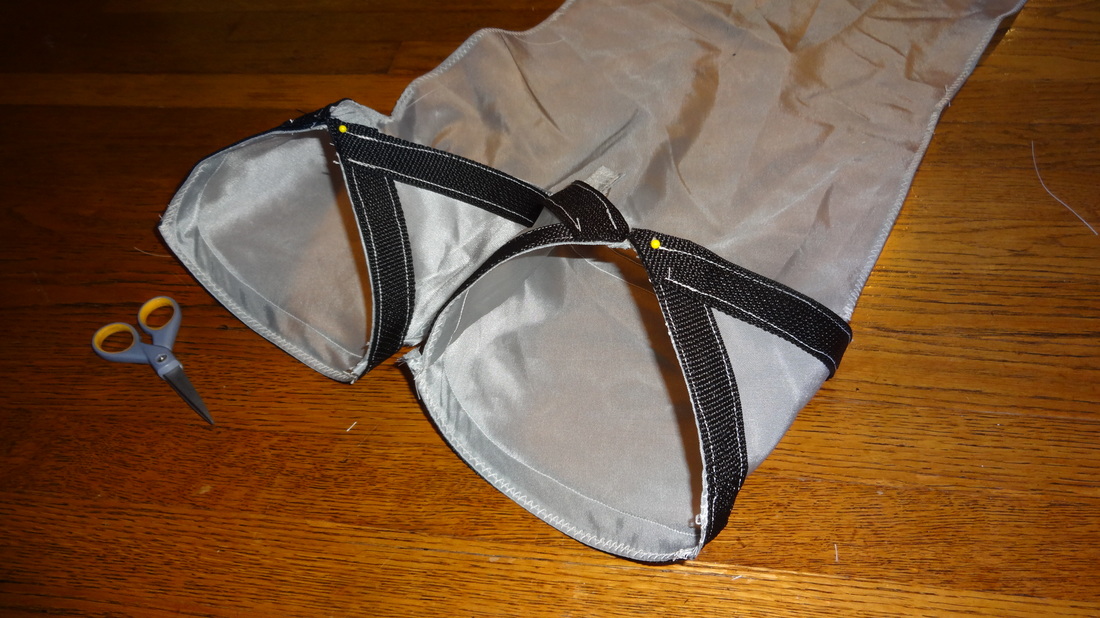
Leg loops lines with 1" polypropylene webbing |

|
|
|
|
|

|
Shoulder strap adjustment
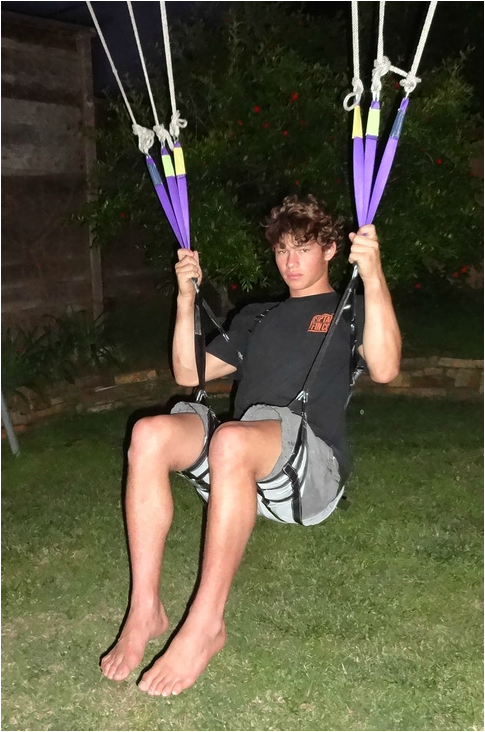
Finished harness
Finished paraglider:
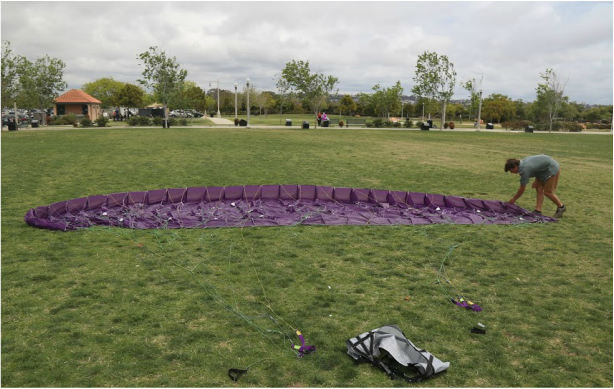
First time laying out the finished glider

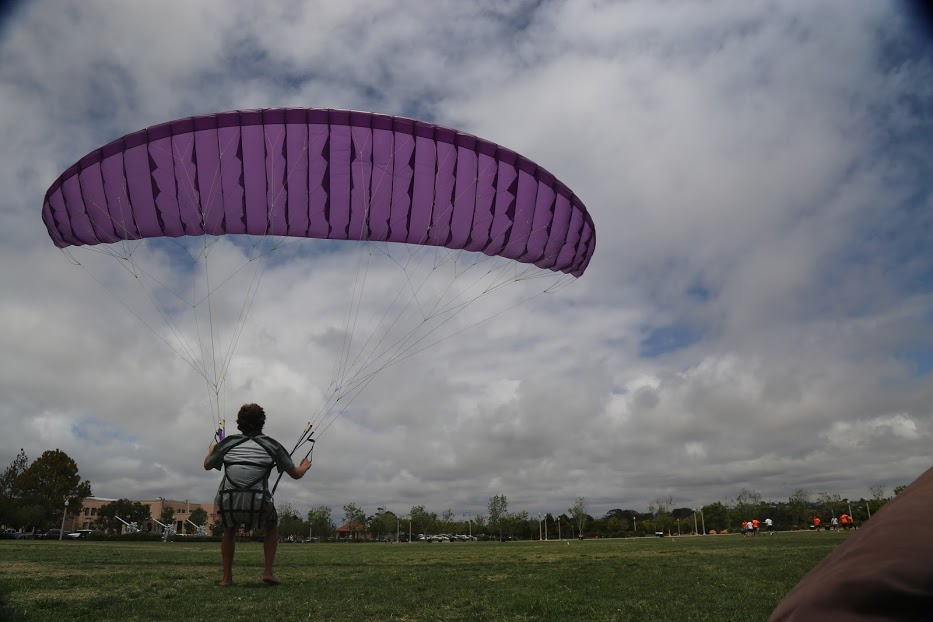
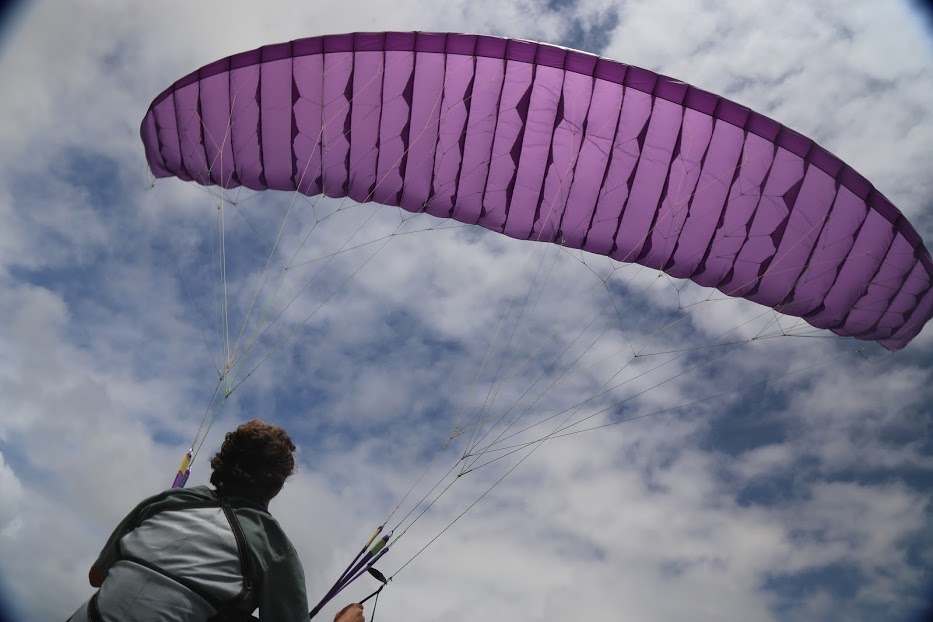
The length of the brake lines on single skin paragliders needs to be very precise. If you look at the trailing edge of the wing you can tell that the brake lines are too tight. This causes too much drag and made me move backwards. After making careful adjustments to the brake lines I brought it back out to the field. This time, with the brakes properly adjusted, lifting and controlling the kite was much easier.
All work is concluded: May 20th, 2016
First flight:
Because I have never flown a paraglider before and because it was home made prototype I took it out to the Algadones Sand Dunes to ensure a soft landing. Despite the strong crosswind, the paraglider performed well and felt very stable. The controls (brake lines) also worked perfectly keeping me in line with the wind and on the landing. Although it can not be seen the flight starts about 2 seconds into the video.
